 Scrivener instead of Microsoft Word
When I wrote my first travel guide using Microsoft Word, it grew into such a large document, it was difficult to keep track of which sections I’d completed and which were still “works in progress”, and I spent countless hours searching and scrolling through the elaborate system I set up to track my progress.
I used notes and colour highlights, to remind me of what still needed to be completed, edited, proof-read or re-written.
I knew that if I wrote another travel guide, I’d need a more effective process, and before I started my second travel guide, I switched to Scrivener.
Using Scrivener Labels & Status to overcome Procrastination
I must confess, at the beginning of the writing process, I didn’t really leverage the built-in tracking functionality, but as soon as I reached about 75% complete, I hit the procrastination phase of writing.
I spent a couple of weeks just flitting about my manuscript; doing nothing more than tweaking punctuation and nudging paragraphs around.
I knew it was time for some serious intervention, so I started to use Labels and Status to keep track of my progress and provide some visual motivation to reach my self-imposed deadlines
How I use Labels & Status keep me on track
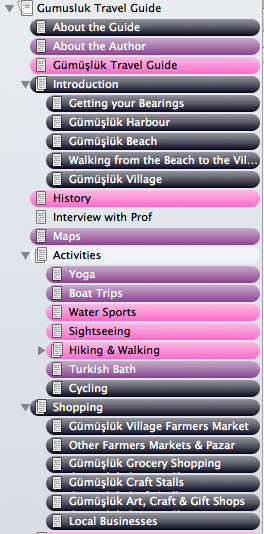
I devised a colour-coding system using Scrivener Labels and also updated the default Status settings, and this image below, shows the first round of Label tagging:
Here’s the workflow I created for my chapters, so that I could track their progress and current status:
- Pale Pink Label = “Concept”:
- The first version of a page has a title and no content, and maybe a few notes on the index card, and I know I have to start from scratch on these pages.
- I use the Status of “To Do”
- Purple Label = “Add More Content”:
- Used if I’ve only added partial content and known I need to add more.
- Examples when I’ve used this Label are; I’ve written an opening paragraph, but have more content to write; I’ve written a list of topics I want to cover and need to expand on them.
- I use the Status of “To Do”
- Bright Pink Label = “Needs to be Edited”:
- As soon as I’ve included most of the core content on the page, and future edits are more about structure and organization rather that concept and ideas, I’ll move it to this Label.
- This is the core “edit” phase of the review process, and I move the Status from “First Draft” to “Revised Draft” and then “Final Draft”.
- These various Status really help me to identify the level of effort that’s required to complete the content. I have an automatic reminder that a page at “First Draft” is going to take a lot more effort than a “Revised Draft”.
- When all the edits are completed, I use the Speech Tool to listen to the content. Once I’m happy with it, I’ll move it to “Final Draft” Status.

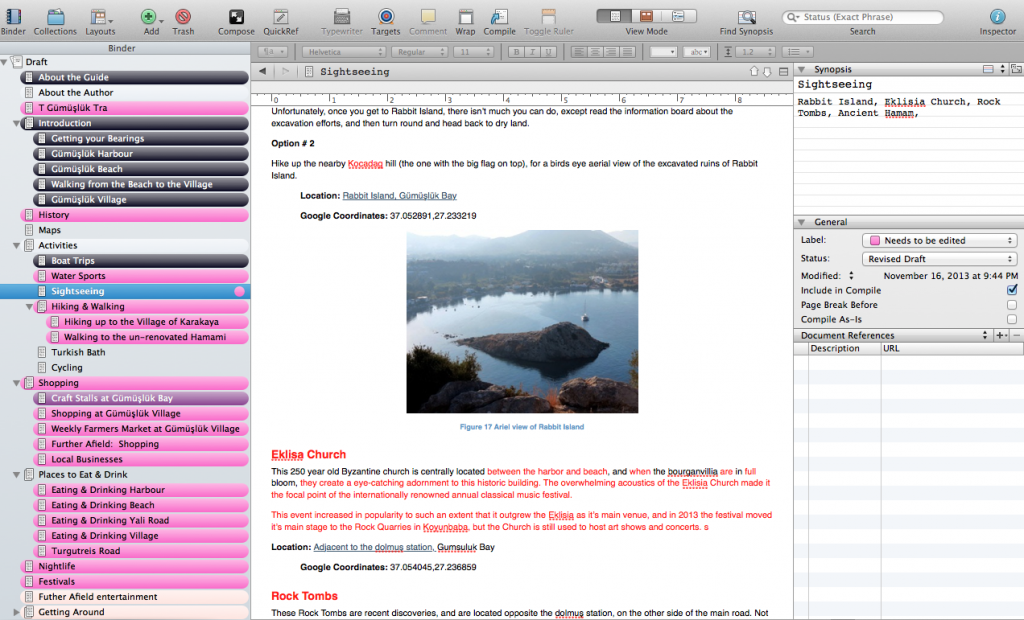
Figure 2. Lots more chapters at the Ready to be Proofread phase
- Black Label = “To be Proofread”
- After I’ve given the content it’s final review, I’ll assign it the To be Proofread Label.
- I’ll proofread it when I have some quiet time, and will give it another listen via the Speech tool.
Green Label = “Final”
- When I’m confident that I’ve completed all the proof reading, and am happy with the spelling and grammer, I’ll change the Label to Final.
I took a print screen of my Scrivener screen when I started this article a couple of weeks ago (Figure 1 above), and then took another screen grab tonight (Figure 2 to the right).
And as you can see – I’ve made some great progress over the past couple of weeks!
Many more chapters have been moved from “needs to be edited” to the “proofread” phase, and it’s really motivating so see those Bright Pink chapters slipping away to be replaced by the Black.
Next step is to Proof Read them so I can move them onto Green, and once all of the chapters have been transitioned to “final” … I’ll be ready to publish.
Visual Reminder of Progress
It’s incredibly rewarding to see a visual representation of the progress I’m making, but also really useful to have an instant reminder of the current status of each chapter and the level of effort required to complete it.
The useful thing about the Labels and Status is that you can name and colour-code them to anything that works for you, and the process you can devise can be as simple or complex as you want.
The beauty of Scrivener, is that its completely customizable. With a little bit of planning and tweaking, you can create you own version of these progress tracking tools that will work for you.
Read how other Authors and Writers use Labels and Status in Scrivener
- Write for Apples (this website shows you how to create your own labels and statuses)
- Jennifer Kettell
![]()
Disclaimer: I’m a Scrivener Affiliate and here’s a link to purchase your own copy, and a link to the Scrivener Coach website.


Pingback: Infographic: Field Guide to Procrastinators | Jay Artale