
 Scrivener for Freelance Writing
Up until recently I had all my guest blogging activity and freelance writing activity in one Scrivener Project, but now that I’m doing different freelance writing gigs sourced from multiple different freelance sites, I’ve started to create separate projects by Freelance Website.
Scrivener Project Binder
Here’s an example of my Scrivener Binder for one of my Portfolio and Freelance writing Projects. The the following bullet point list is a summary of how I organised the Binder up:
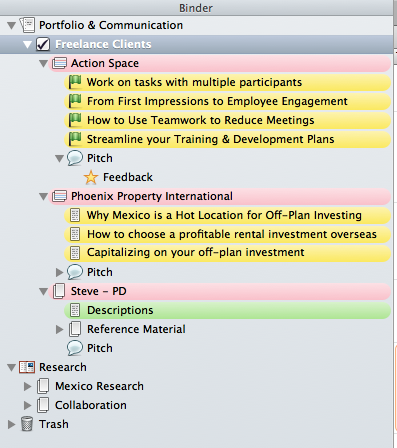
Binder Panel with File Set up
Scrivener Folder Set up:
- Each Freelance Client gets its own folder
- Each Article is a sub-folder
- I capture the Job Pitches in a sub folder
- I capture feedback, rating and praise received from the work stream and add it to a sub-folder
- In the Research Folder I create subfolders by topic.
Scrivener Labels:
- I use Pink for Client Folders
- I use Yellow for Blog Articles and Web Content
- I use Green for Product Descriptions
Scrivener Icons:
- I use Green Flags to show that an article has been published on a host website
- I use a Speech Bubble to indicate a Pitch
- I use a Gold Star to indicate Feedback
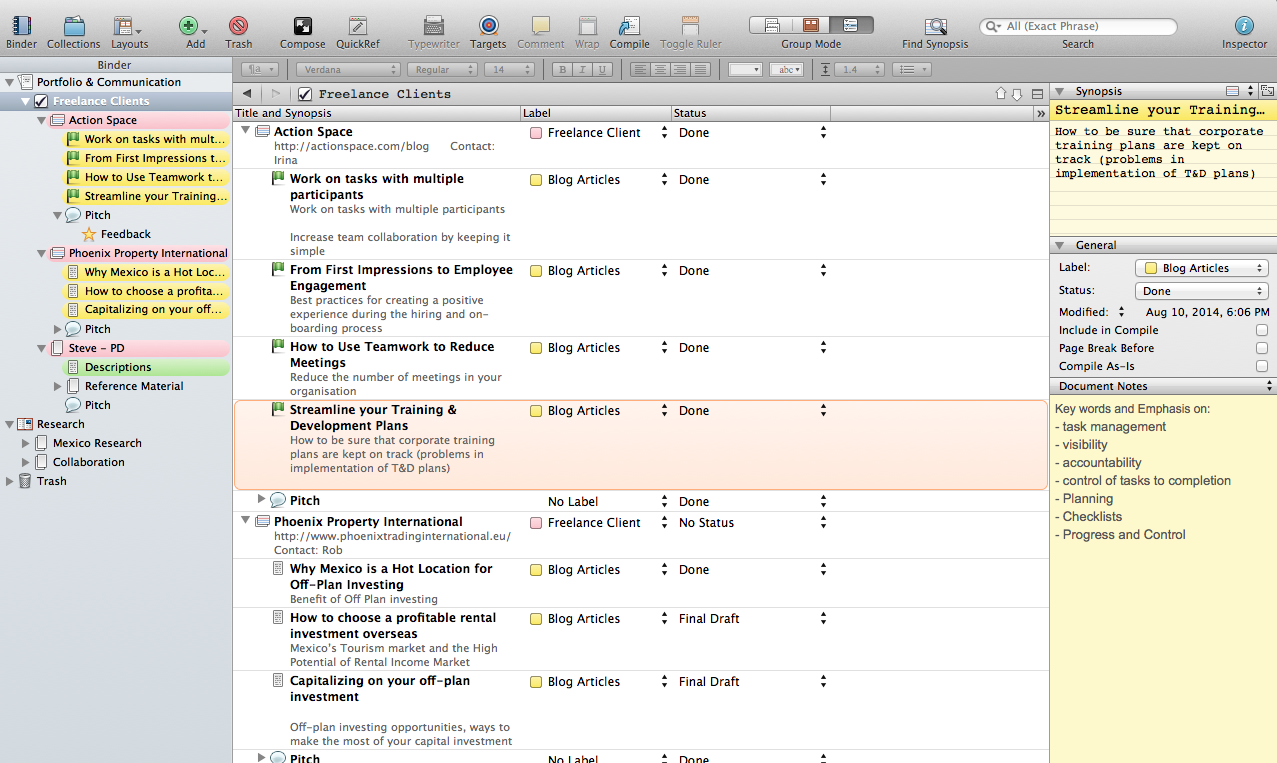
Scrivener Outliner View
You have three different Group Mode Views available: Corkboard, Scrivenings and Outliner Views.
When I’m writing content for my books and blogs I rely on the Corkboard and Scrivenings view, but hardly use the Outliner view.
Now that I’m tracking progress for Freelance Clients I’ve realised the benefit and usefulness of the Outliner view. It’s provides a centralised way of viewing all content in a list view, and it’s the best view for updating meta-data in one page, instead of having to update it at the folder level.

Scrivener Outliner View Panel
This is a new Scrivener Project, so I’m only using the default columns for this Outliner view, but there are lots more columns available to unhide, and you even set up your own meta-data fields and add them to your Outliner view.
I know I’m going to be evolving this Outliner view in the near future to make it even more functional (starting with an addition of a due date field).
The beauty of Scrivener is that you can personalise it so that it’s optimised for YOU.
Scrivener Inspector Panel

Scrivener Inspector Panel
By default the Inspector Panel is hidden, but you can make it visible by clicking View > Layout > Show Inspector.
In the Outliner view you can click on one of your articles and it will show you the related Synopsis, Label, Status, Date Modified and any Document Notes in the Inspector Panel.
Synopsis:
The Synopsis is the information that shows up on your index card in the the Corkboard view. In my Freelance jobs Project I use the Index card to captures the Article Title and Summary of the Article content.
Scrivener Status:
- I use To Do, First, Revised, Final and Done.
Document Notes:
For my freelance jobs I use the Document Notes section to capture the Key Words and Notes about the assignment. This is a handy visual reminder, and is an incredibly useful feature when you’re writing your article.
No matter what view I use, I really rely on the information in the Inspector Panel, and the first thing I do when I create a new Project is to make this Inspector Panel visible.
Summary
My use of Scrivener has really evolved over time. I’d assumed that I would use the same features and functions for every project. Now that I’ve started using Scrivener for Freelance Writing, I realise the raw potential of this software programme. No matter what type of writer your are, Scrivener can work for you.

Pingback: Using Scrivener for Social Media Management - Jay Artale